Sunday, July 3, 2011

Work in progress

July already, where do the months go? It's close to the middle of winter and Dunedin is yet to see a decent frost. This would be the first year the lawns didn't stop growing, maybe due to the Chilean volcano or a nuclear winter, but it sure makes for some great potting weather! Here are some pics of work in progress.                  
Some miniatures and some scaled up pieces with lids. As they get bigger I may have to add  handles and lugs.

Yesterday I added a work bench and more robust shelving. This small room off the throwing area is where I wedge, store and recycle clay, place pots on the shelves to dry and have a bucket of creek water to wash up in.


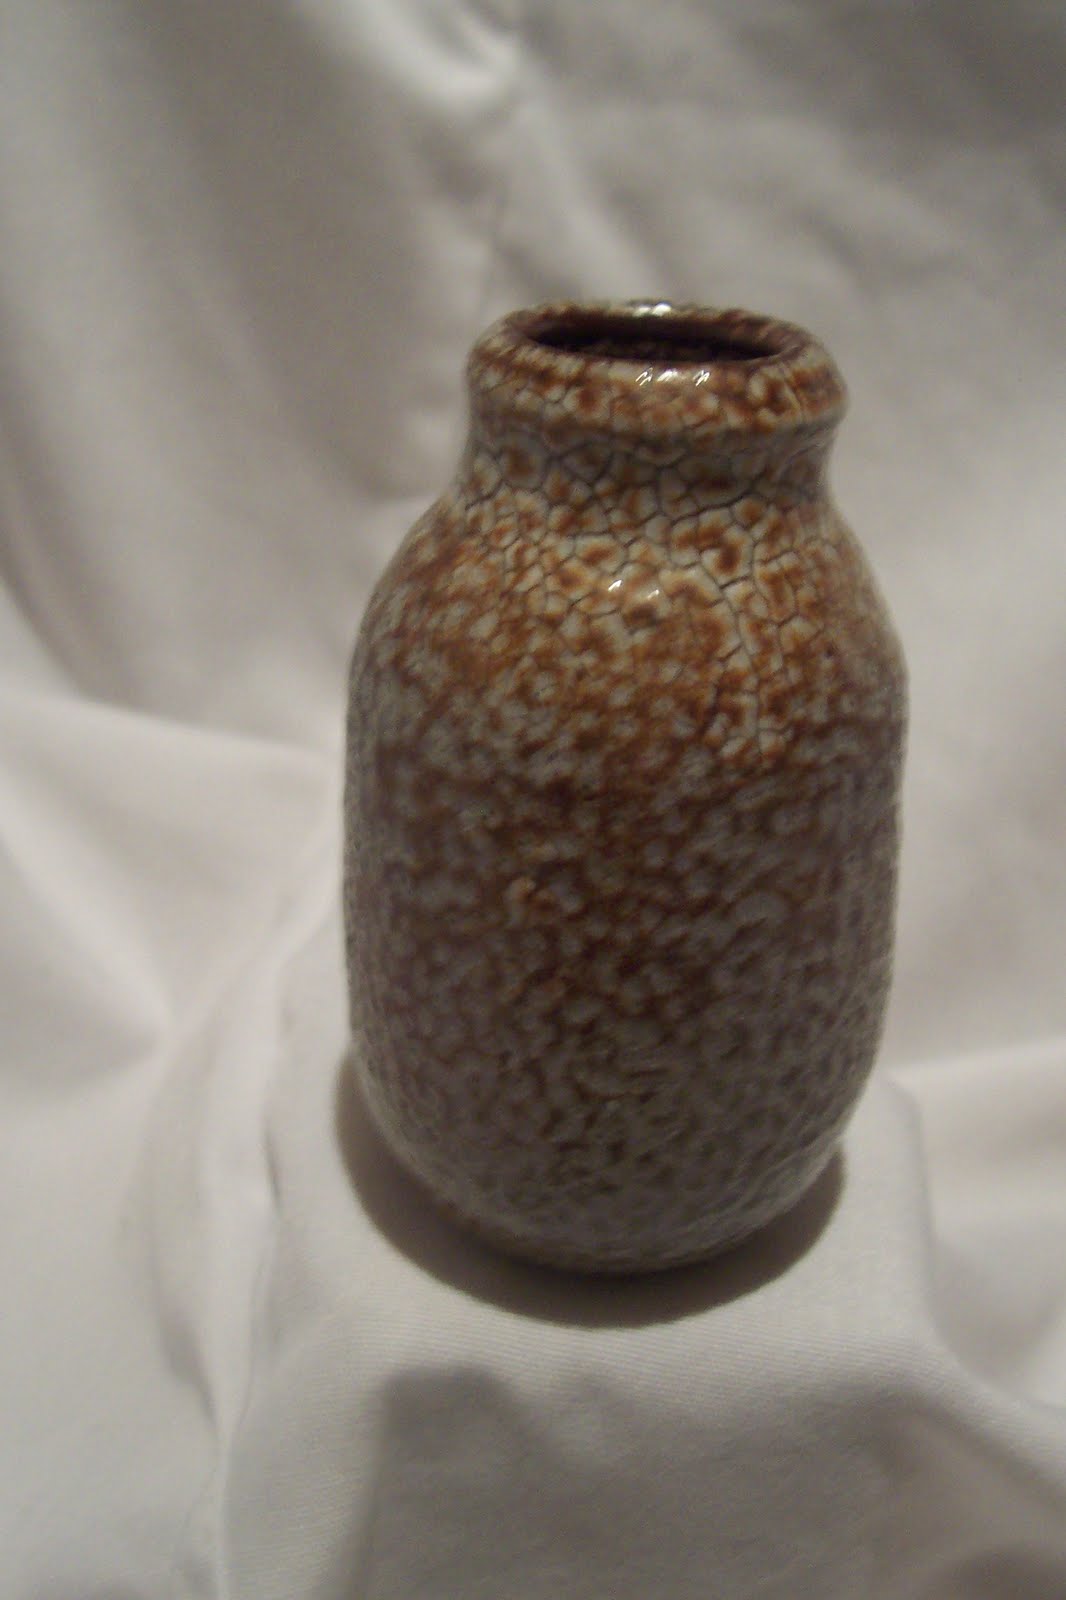
Here are a few test glazes from the previous firing using sump oil as a fuel. This is Marcus O'Mahonys " Light orange slip" The recipe is:  Porcelain clay (dry weight) 20 ( I used the white stoneware clay body) China clay 10, and Tin oxide 3. All recipes on this post are found on pages 232 and 233 in Phil Rogers book:  "Salt Glazing".

Here is the same glaze but on a buff stoneware clay body (southstone) All tests were dipped at least twice to get variations in glaze thickness. Note the interesting pattern around the top of this example where the glaze was quite thick.

A very typical salt glaze effect. This mottled texture is called "orange peel" and consists of an extremely simple glaze of just two components: Ball clay 50 and China clay 50, fired to 1300+  with plenty of salt.

In this example of Arther and Carol Rossers' "Blue slip" consists of : Feldspar 15 (Indian ), Silica 8, BBR (clay ceram)?? 30.5 (I used Kingwhite kaolin), Eucalyptus ash 15.5 (washed pine ash), Titanium dioxide 0.5, Cobalt Carbonate 1.  Now that I look at this recipe it doesn't resemble the original much at all. Part of the joy of pottery is the unexpected.

Another A+C Rosser Glaze "Green slip to be sprayed over blue" However,  this example shows only the green slip - a very beautiful glaze on its own.  I still have the test pottle, so in the next firing I'll try it over the blue slip above.
 In my next firing,  I will be using bigger batches of glaze on larger pots and firing a slightly bigger kiln.  I'll be using canola oil from the fish and chip shop, and comparing this to sump oil -  hopefully getting similar results.  

Thursday, June 23, 2011

Ba Duan jing

A recommended stretching routine before throwing. Play these videos simultaneously.                                                                                              

Sunday, June 19, 2011

Bernard Leach: A Potter's World

I'm just trying out the video embedding feature - I thought I'd post this extract from Bernard Leach's black and white movie 'A Potter's World':


It's good to see one of the old masters at work and hear his philosophy of pots.

Wednesday, June 15, 2011

A good day to pot .

Over the last week I have been eager to spend a good part of a day throwing pots. However, things have a way of cropping up, with mail volumes above average  -  meaning longer working days -  housework, mowing lawns, chopping wood, etc, all  diminish precious potting hours but at the same time are intrinsic to the pottery lifestyle. I try to spend a couple of hours a day throwing cylindrical forms not necessarily to keep them, but to improve my standards.

Three pound cylindrical forms measuring twenty seven centimeters high, ten to twelve centimeters wide, complete with or without a gallery, set the standard for my work. With these dimensions the finished pot will look loose and feel light when finished.

The open fire, a perfect place to warm my bones, relax and contemplate the next pot.


A view out the recently replaced bedroom window looking out at Taylors Creek. Someday soon I hope to furnish it simply, cheaply, with an art deco style bed, dresser, wardrobe and desk all from the local tip shop.


Little critter sitting inside a freshly thrown pot . It's a large horsefly that emerged when I lit the fire. I don't mind it having a closer look.


Looking out the parlour window at a scene seen on many pots: wild grass with moon in background.


Night potting. A lovely cosy fire and ambiant light.


Time to call it a night

This weekend I will be stocking up on fuels such as kerosene or citronella for the lamps, some more diesel and petrol, and about sixty litres of canola oil from the local fish and chip shop, for my next firing in a couple of weeks or so. 

Sunday, June 5, 2011

Multi-fuel jet burner and carburetor

In this post I would like to mention my trusty burner system. I've only ever needed one burner to get up to temperature even for the large kiln at the top of the page .It can run on sump oil obtained free from a mechanic, or canola oil from the local fish and chippy, but are designed for diesel. Sometimes I mix all three together and cut it with a little petrol. I am always experimenting with various fuel mixes, researching flash points on the net, and am in the process of developing a filtration system for cleaning up waste oils. Maybe I'll purchase an old diesel car and beat skyrocketing fuel prices!        

It's pretty full-on firing a kiln with diesel -  the roar of the burner easily drowns out the old electrolux vacuum cleaner I use for a blower. There can be a lot of smoke, but it will burn clean if oxidation is desired. It's a lot more dramatic and hands-on than a gas kiln and is not for the 'clean freak' or the faint hearted.                                                                              
Diagram from New Zealand Potter mag No. 1, 1991 showing cross section and details of burner. On my burner I don't have the water pressure gauge but might try it on my next one when this one wears out

Detial showing jet orifice and primary air hole.Secoundry air is sucked in around burner.


More details of the jet burner tip

Attached to the burner I use a precision tap for turning the fuel up or down


Plastic fuel line attached to copper pipe going to the tap then into burner, then exploding under the floor before entering the main kiln chamber
My original design for the carburetor to mix the air with the fuel . Simple but effective. I also use an old cistern elbow between the carburetor and the burner.
                                                                                           

Carburetor with two sliders and hose coming from vacuum.

Fueling up a old LPG tank converted to diesel found at a scrap metal yard for five dollars. I also have another tap here so I can remove the fuel-line when not in use.
 Using diesel can be more dangerous than firing with wood especially when extremely high temperatures are involved. Fire bricks can easily glow red hot, and caution must be used when removing spy-hole bricks around the fuel line.   I've been doing this for a number of years and I was trained at art school under expert supervision. I've gained confidence through necessity,  having to do repairs in the middle of firing and so on. There is some mechanical aptitude required, and I urge caution at all times.  If in doubt get assistance and advice before even starting to build and fire kilns.                                                                        

Tuesday, May 31, 2011

Convalescence

I've been off sick in bed for several days with the flu and haven't been able to do much at all. It's been quite an out of body experience with even walking being in slow motion and my co-ordination is shot. It's been a real drag when its so hot and sunny outside with so much to do and so little time.  After four days I was feeling well enough to get out of the house and go for a walk around the block.

A view from the top of Bennet's Rd looking down on the estuary.
Autumn sky
Coastal erosion and king tides at this time of year

Sunday, May 22, 2011

Winter Studio

It's been a busy month and the weather is unusually warm for this time of year, but now it is time to move down to the winter studio before the cold weather closes in. I have been working on fixing up an old shack that I have been using as a studio for a number of years. It is actually an old pioneer cottage that was built in the 1860's. It's seen better days but that just adds to the character and most importantly, it has an open fire.


Autumn colours of wilding cherry trees at the gate.

The potter's cottage and salt kilns

The old kitchen, transformed into a throwing area. Test pots thrown off the hump, drying, and ready to be dipped in glaze and raw fired.


The old bedroom window. I have been using plastic to keep out the elements and have been picking up cheap windows where I can. So far I have replaced four windows. It's so nice to have a view through glass and it's much warmer than plastic!


The old parlour (or sitting room),which I've furnished from the local refuse recycling shop at Green Island. A good place to relax and warm up by the fire.


These are the salt glaze slips that appear on pages 232-233 of Phil Roger's excellent book, 'Salt Glazing' (2002). Applied to raw test pots before going into the kiln.


Cutting shelves to size, and using some of the off-cuts as props. I also cut up old fire bricks for larger props. These are all then shelf-washed to protect them from the salt and hopefully make them last a little longer.


Here I am checking to see if the stack will fit in the kiln. I had about a centimetre to spare!


Steam created when throwing salt into the kiln. I started salting when Cone 9 went over and threw in 14 pounds of salt over the duration of one hour, which melted Cone 10 (1300 deg C) in the top and bottom of the kiln, so it must have reached Cone 11 (1320)  or 12 (1340-50 deg C, given that there's about 20 degrees between cones), but it made for some beautiful high-fired results.


The next morning I got home from work to open up the kiln and see the results, which were very much to my satisfaction.


In this firing, I used sump oil as a fuel and burned it cleanly in an oxidising atmosphere, attempting to achieve copper greens and other various glazes, which I succeeded in doing. Out of about 20 glazes, I got five or six nice ones, which I can make bigger amounts of glaze and scale up the pieces.